


 I've been inactive in this blogging thing for the past few days since I have been busy at work and I will even be busier next week. I will be going out of town to take care of some important matters and I'm planning to bring with me my Sony Microcassette Recorder so I can just dictate my blogs (that is, if something comes to mind) while I'm on the road then I'll just transcribe it afterwards.
Speaking of data conversion, this method may come in handy in your freelance projects when converting images into text. Instead of doing it manually, using an OCR is quicker and less tedious. Before, I've searched for free OCRs in the internet not knowing that I already have one in my computer. Most computers already have this but I don't think many people use it as frequently as Word, Excel, or PowerPoint. Here's five easy steps to convert images into text:
Step 1: Open Microsoft Office Document Imaging
Go to Start >> All Programs >> Microsoft Office >> Microsoft Office Tools >> Microsoft Office Document Imaging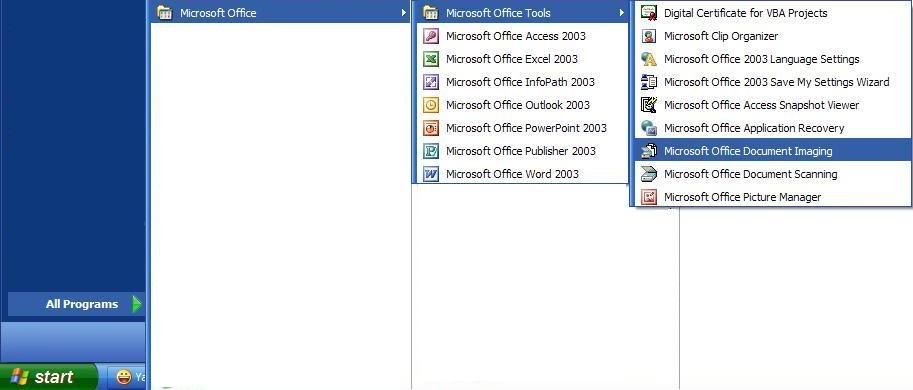
Step 2: Select an Image for Data Conversion
In this case, I just opened a scanned document in PDF. Click the Select Tool. Highlight and copy the data that you want to convert into text.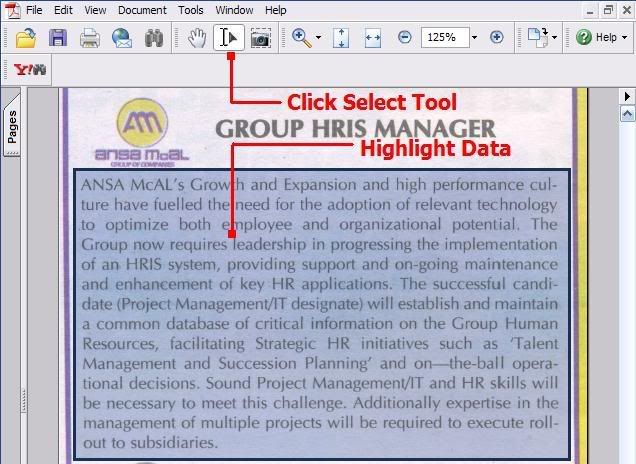 Step 3: Paste Data in Microsoft Office Document Imaging
Click Page and select Paste Page or simply hold Ctrl + Shift + V.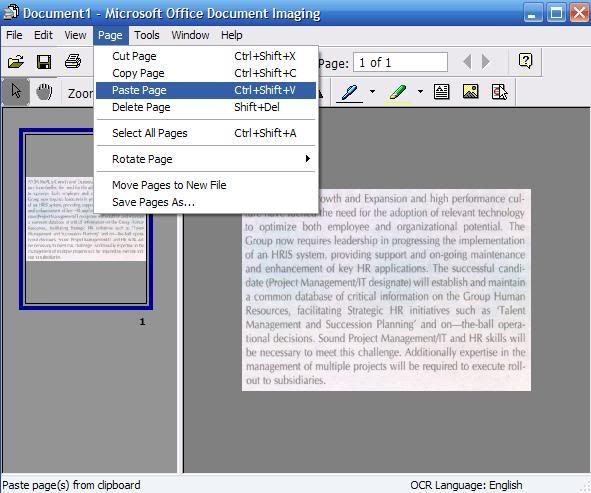 Step 4: Use OCR to Recognize Text
Just click the eye icon to recognize the text using OCR.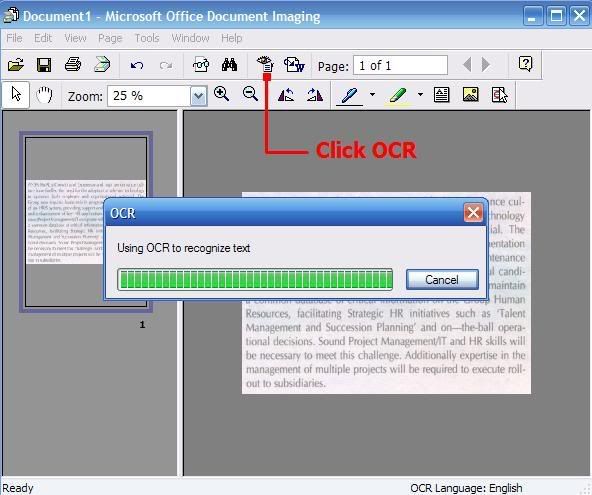 Step 5: Copy and Paste Data in Word
After recognizing the text using OCR, you may paste the data in Word, Notepad, or Wordpad if you like.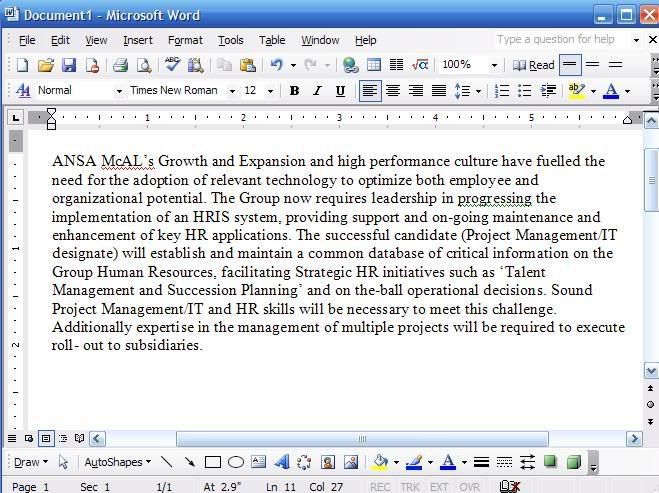
Since these OCRs are not as smart as humans (ok there may be some exceptions), they are not always accurate so you still need to check it for any possible errors but at least you saved a lot of time converting pages of scanned documents into digital text. Hope you find this useful as it helped me a lot.


Saturday, February 7, 2009
Data Conversion Using OCR
Subscribe to:
Post Comments (Atom)


0 comments:
Post a Comment